

Quick Overview
Categories
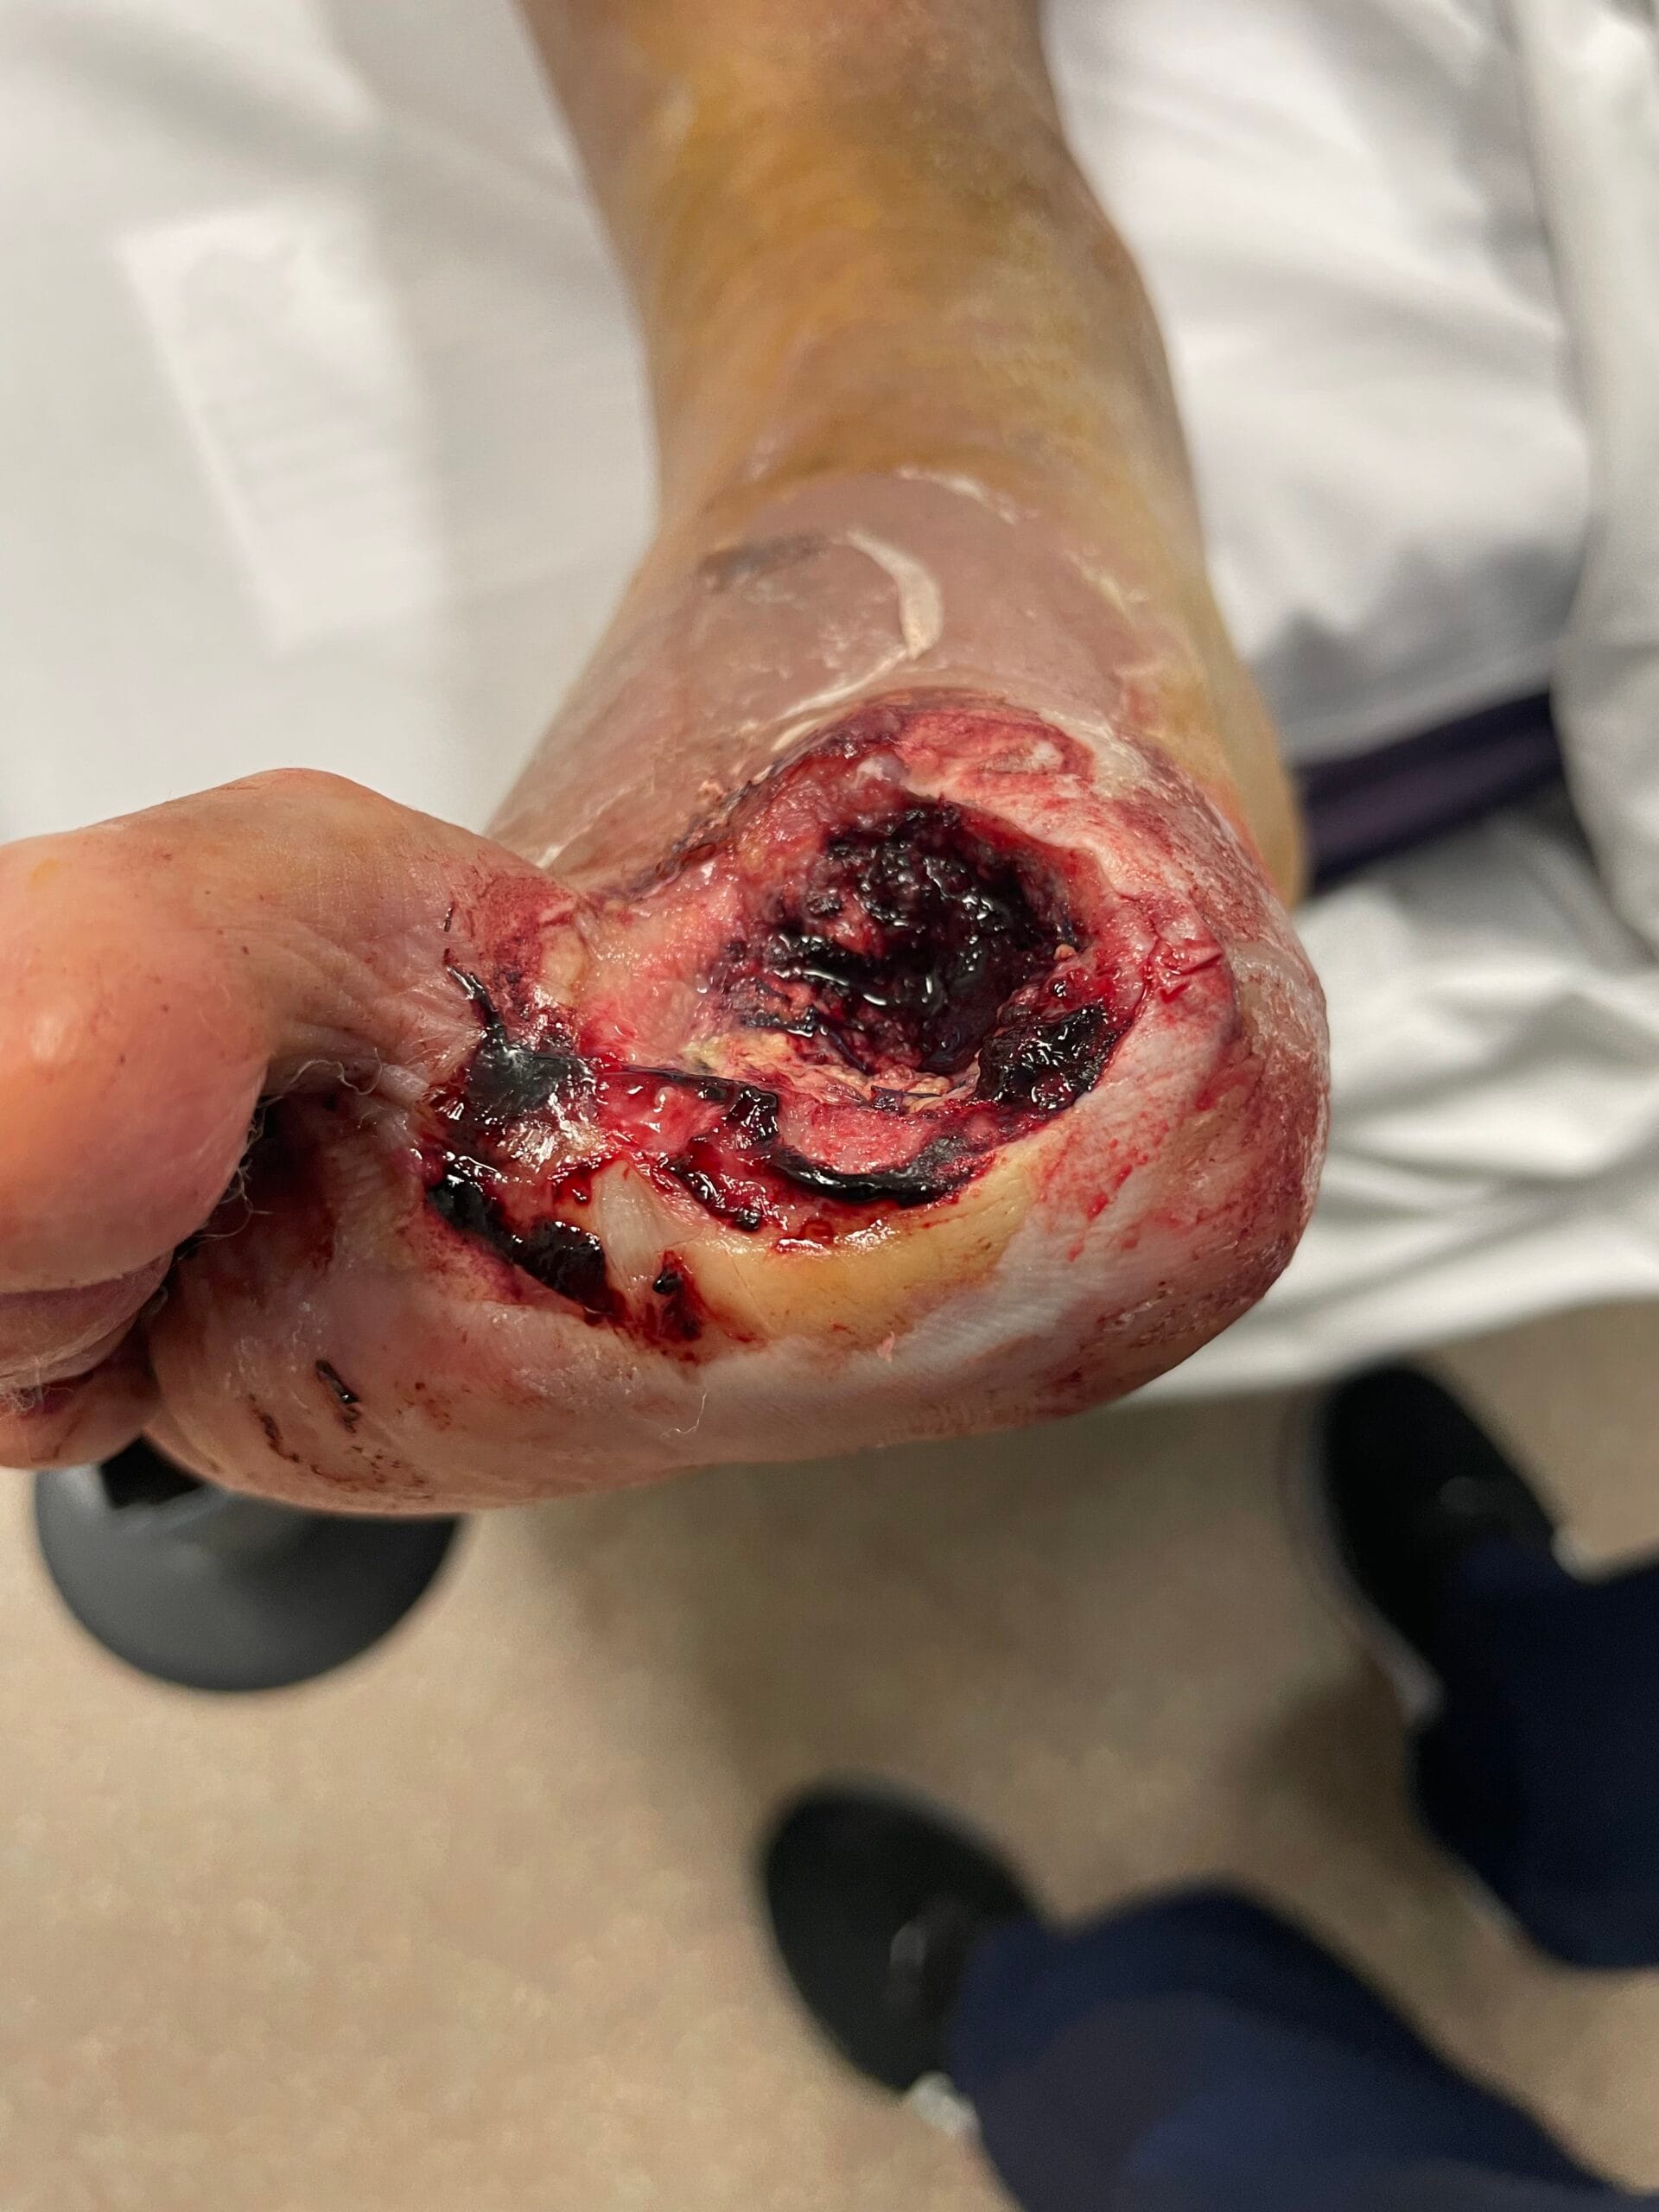
Aim of Dressing
Increased granulation tissue growth by applying negative pressure wound therapy. By using a Vac dressing this can reduce the bulkiness of the dressing and can facilitate early mobilisation with physiotherapy using orthotic footwear.
Tips & Tricks
Always make sure the patient's foot it elevated on a pillow or is not being obstructed by sheets before starting the dressing so that you have access to the entire foot
If the patient is mm mobilising try and use a bridge dressing
If the patient's foot is oedematous allow the friars balsam to dry and then reapply for improved adhesion
Dressing Changes (Min - Max)
2nd Daily (Mon/Wed/Fri)
Shopping List
Dressing Pack (Large)
Vac Dressing Foam – Black – Small
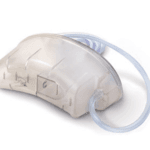
Activac
ACTIV.A.C.™ Cannister
Friars Balsam (25ml)
Product Selection Disclaimer:
The wound care products being currently used are a suggestion ONLY. They do not take into account your patient's individual needs which you must assess. No funding from medical companies has been provided and wound care products are chosen on their merit and what is available on the NSW Health State Wound Care Contract. Where an exact brand name product is not available we suggest you review the alternative tab or use another wound care product from its category eg. Hydrofibre
Video Tutorial
Tutorial Steps
Swipe
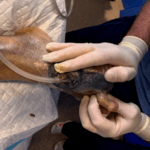
Firstly setup your sterile field, opened all your sterile products onto the field, washed your hand and put on your sterile gloves.
Clean the wound bed first and then proceed to the peri-wound remember to demonstrate Aseptic Non Touch Technique.
With A different set up forceps paint the peri-wound with friars balsam and allow to dry. Feel free to fan the area to help increase the evaporation of the liquid.
** If patient’s peri-wound is oedematous you may need to do this step twice**

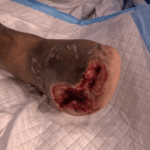
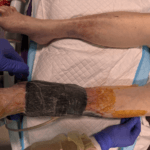
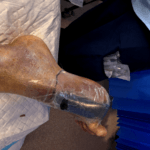
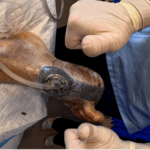
Visually cut the first piece of foam to size. You can put it onto the wound bed and adjust if necessary (I did not do this in the video). Once the piece is cut to size grab your first film piece. I cut mine into 6 equal pieces so that i can manage them easier.
I find it easy to partially open my first piece of film and stick the foam to it. This allows for easy placement. Then place the remainder of your film to make a air tight seal.
Cut a small (1-2cm long and 1-2cm wide) hole in the film you just placed on top of the foam. This will connect the wound bed to the bridge we are making.
The film you have laid down before to secure the first piece of foam will protect the patient’s skin. If there is no film on the patient’s skin where the foam needs to go you will need to add more.
Cut a piece of foam the length your bridge needs to be. The same technique of sticking the film to the foam was used to make life easier.
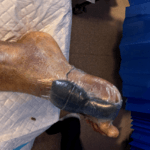
Cut a hole in your bridge so that your last piece of foam can sit on top of it. This technique is called (at least for me) the ‘Mushroom technique’ .

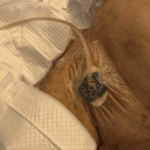
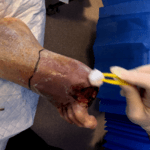
Cut a piece of foam the slightly bigger than the size of the track pad and then secure with film.
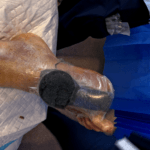
Invert your scissors and cut a large hole the size of the track pad in the film covering the mushroom. If the hole is too small then the vac machine will think there is a blockage in the line.
** Think 50c piece **
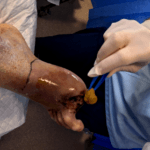
Place the track pad on and then removed the blue pull tab attached to it.
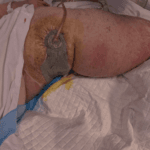
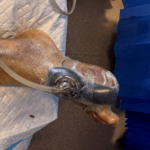
Connect the dressing to the vac cannister (Activac cannister 300ml shown). Then place the cannister into the machine and turn on.
** Apply the appropriate settings for your patient. Click the above link for the Vac machine and it will guide you to the appropriate settings**
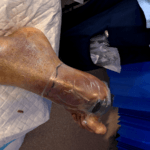
Work your hands around 1-2cm around the outside of the vac foam as the machine sucks down. This will aid in stopping any leaks forming. If a leak is found then where you place your hand and the dressing sucks down is where the hole is. Sometimes they can no be seen only heard.
Double thumbs up! You did it. If there is any film left keep it as you can use it to plug any holes that may occur over the next 2 days.

Be like The Fonz
General Notes
What have we learnt:
1.Friars balsam is very useful for high friction areas or slightly macerated areas to improve the vac film adhered
2.VAC dressings don’t have to be fancy and shouldn’t be feared
3.Massaging where the foam, film and skin meet improves the chances of removing areas of leakage.