

Quick Overview
Categories
Scope of Practice (ScOP) Designation
Treatment Goals
Reduce the bacterial load on wound bed whilst providing a moist wound healing environment for the granulation tissue to form. This patient in particular could not handle having a vac dressing placed on which is why it was not used.
Additional goals include:
1) Removing the flaking skin from the foot and applying white soft paraffin
2) Podiatrist review for the large toe nail before it causes a wound itself +/- complete wound care dressing
Aim of Dressing
Reduce the bacterial load on the wound bed and the chances of biofilm forming whilst providing a moist wound environment.
Frequency of Dressing Change
Consult(s) / Diagnostic Test Required
Refer to High Risk Foot Clinic (POWH)
References
Shopping List
Product Selection Disclaimer:
The wound care products being currently used are a suggestion ONLY. They do not take into account your patient's individual needs which you must assess. No funding from medical companies has been provided and wound care products are chosen on their merit and what is available on the NSW Health State Wound Care Contract. Where an exact brand name product is not available we suggest you review the alternative tab or use another wound care product from its category eg. Hydrofibre
Photo Gallery

Care Plans
Toe amputation
Amputation site that is unable to have a vacuum assisted closure device applied
Swipe
Wash patient's legs thoroughly
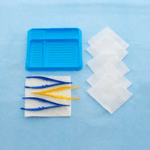
Prepare sterile field
Clean the wound bed
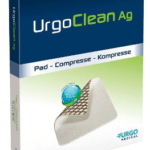
Apply Urgo Clean Ag
Apply biatain non adhesive and secure